Watch the video to learn how to use your Peak
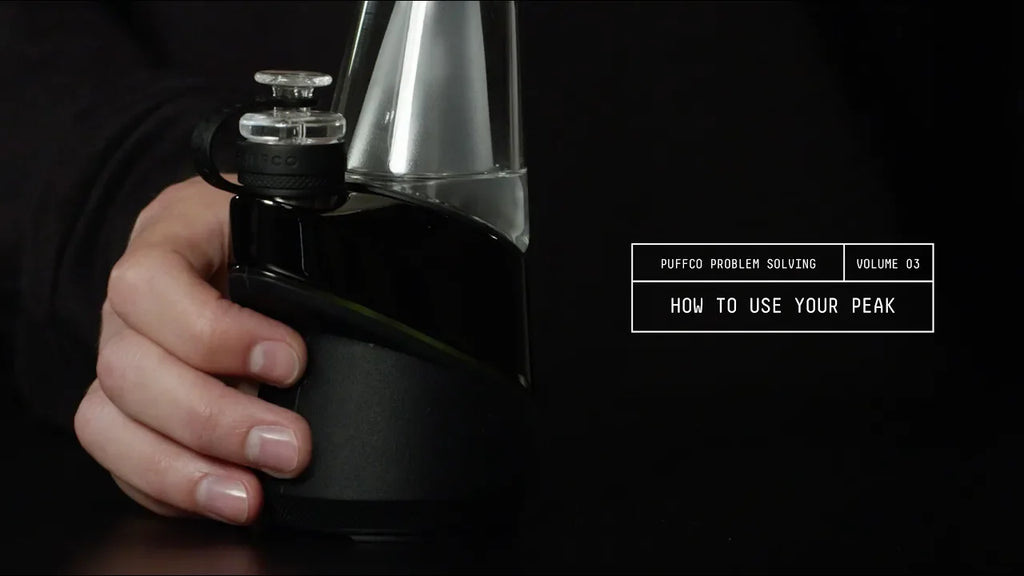
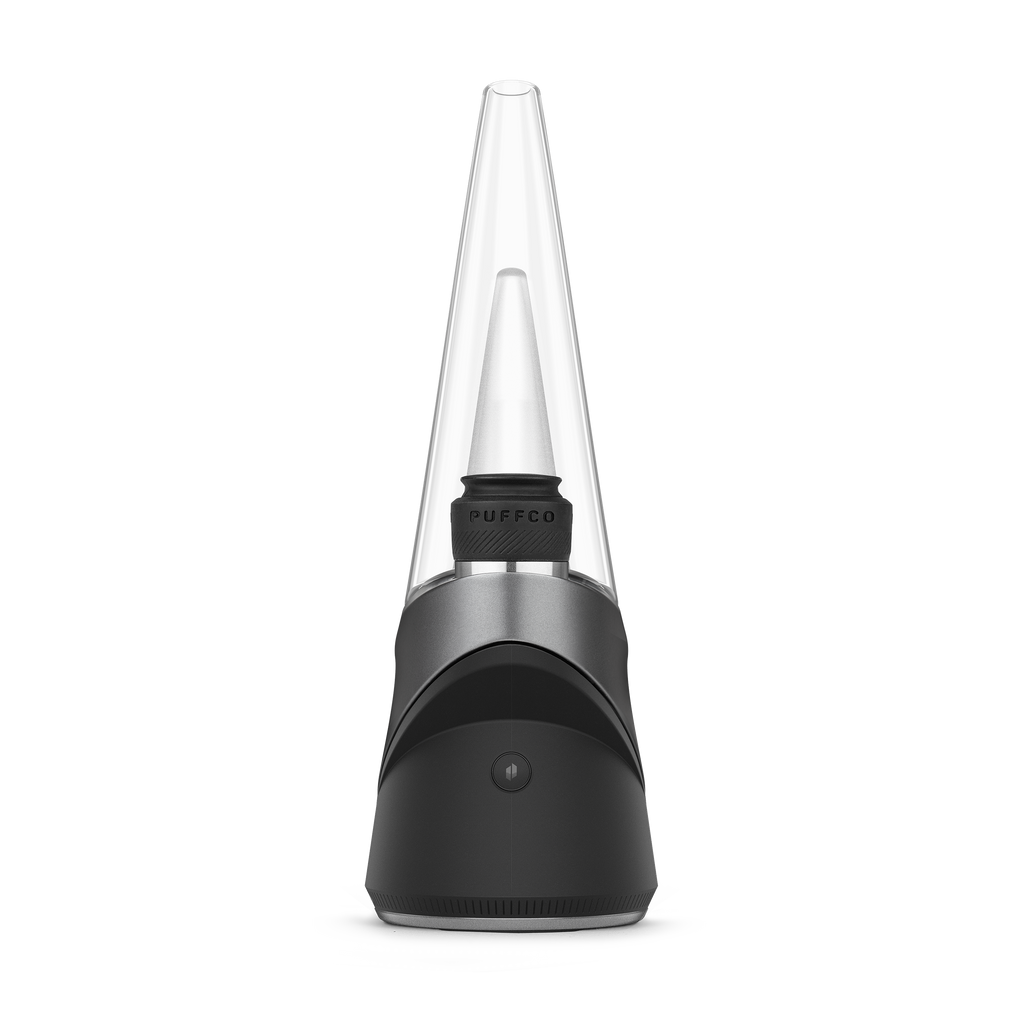
How to use the Puffco Peak?
This video will show you how to use your Puffco Peak from from beginning to end of your session.
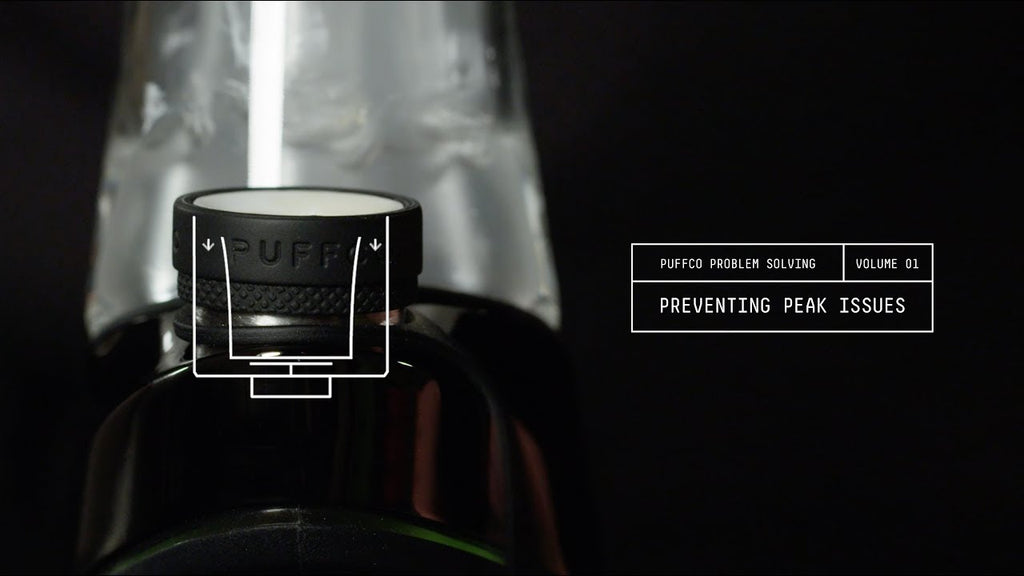
Preventing Puffco Peak Issues
The top 6 tips for preventing Puffco Peak issues, and keeping your device running strong.
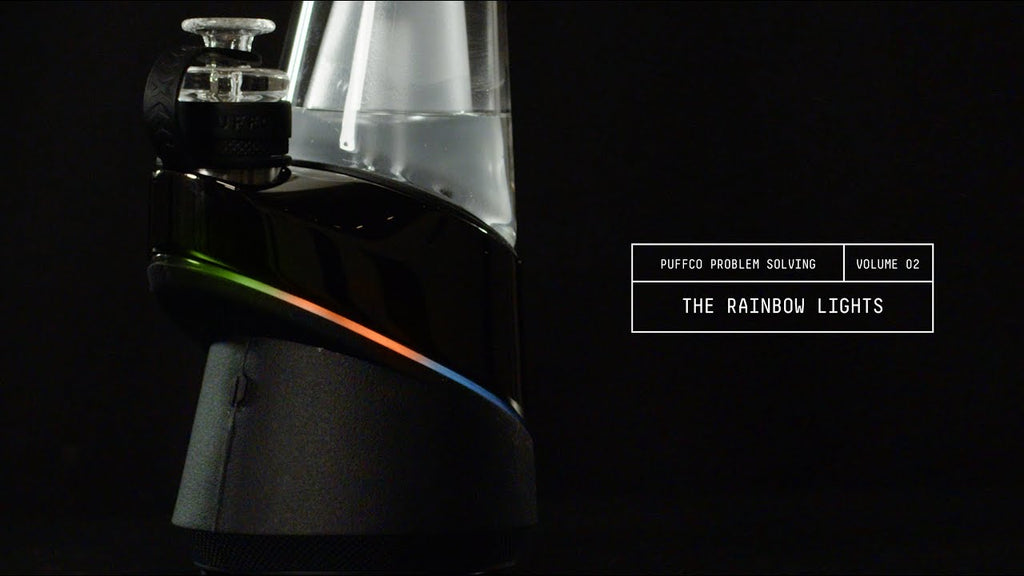
Puffco Peak Rainbow Lights? - Atomizer Check
This video shows you 4 easy steps to try and solve an atomizer connection issue on your own. More often than not, one of these simple fixes will get your Peak up and running.
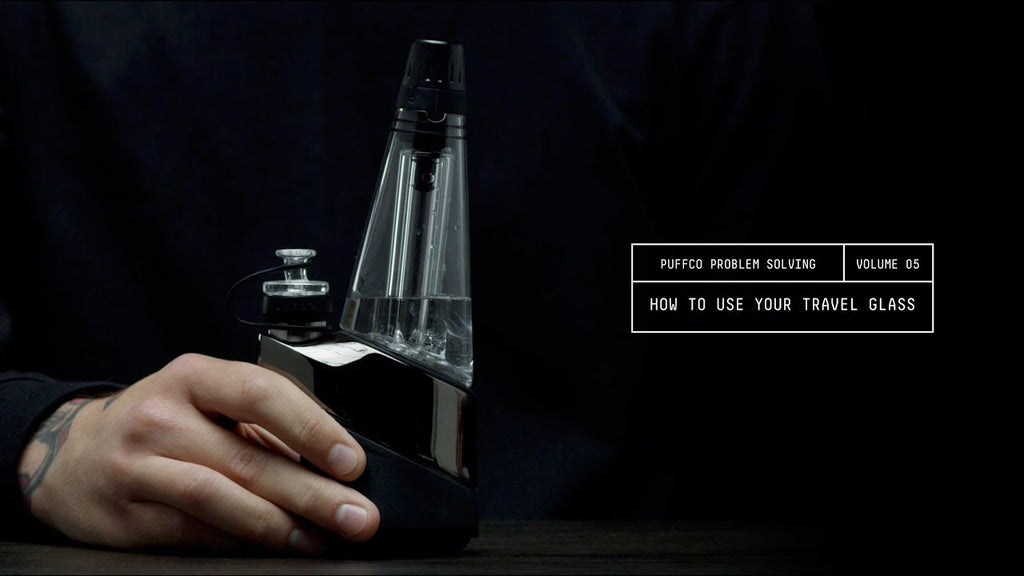
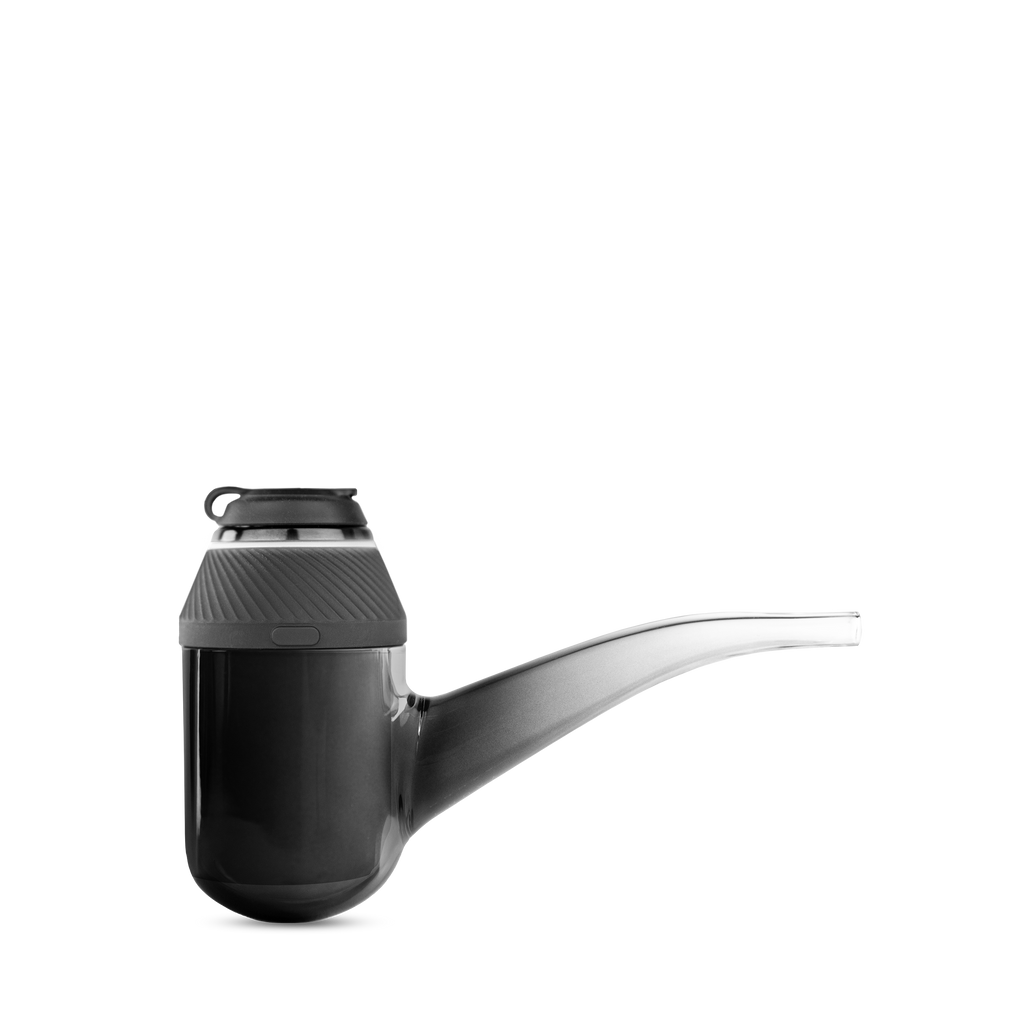
How to use the Puffco Peak Travel Glass
This video will show you how to use your Puffco Peak Travel Glass.
Use the loading tool included with your Peak to transfer your product into the bowl of the atomizer. Always be sure to load the contents onto the bottom of the bowl rather than along the sidewalls of the bowl for the optimal experience. Once the atomizer has been loaded you can double click the button to engage the heating element and place the carb cap on the top of the atomizer. You can also load your product while the atomizer is warm as you would with a traditional rig.
Simply plug the base of your device into a wall outlet via the USB charger included with your Peak. While charging, the white light will pulse and the light will automatically turn off once the device is fully charged. A depleted battery will fully charge in about 2.5 hours.
While it's okay to use a different charging cable to charge your Peak base, we never suggest using a different adapter or charging brick or using a car charger. PLEASE KEEP IN MIND THAT DOING SO CAN POTENTIALLY DAMAGE THE PRODUCT AND WILL VOID YOUR WARRANTY.
A fully charged Peak battery should last about 30 heating cycles before needing to be recharged. Please keep in mind that using “Sesh Mode” often will deplete battery life quicker. ALSO REMEMBER TO SHUT THE DEVICE DOWN IN BETWEEN USES IN ORDER TO PRESERVE BATTERY LIFE, THE BATTERY WILL SLOWLY DEPELETE EVEN WHEN NOT IN USE.
To check your battery life click the button 3 times. The color will indicate how much battery life remains before the device needs to be recharged: Green (100% - 60%) - Yellow (60% - 30%) - Red (30% - 0%)
We created a Sesh Mode feature that allows you to increase heat and extend your session by 15 seconds mid cycle. This can be helpful if you’ve loaded too much material and you’re in need of a temperature boost, or just looking to share with a friend. Simply double click while in use and the heat will automatically increase and your cycle will extend. Still not enough? Double click as many times as you want to keep the session going!
While there have been different iterations of the Peak atomizer since we’ve released the device, all functionality between the atomizers are the same. We’ve only implemented slight design changes to the casing of the atomizer over time in efforts of resolving some user error related issues such as flooding/leaking.
We always suggest that you attach/detach the atomizer to and from the base fully assembled, with the atomizer jacket on. The top of the Peak atomizer has notches that lock the jacket into place, making it very difficult to fully attach the atomizer without it attached.
Yes, a light buzzing is completely normal when the heating element is engaged and is always more apparent and noticeable when the carb cap is removed.
Puffco provides one year of coverage for only the electronic base & battery. This covers defects in materials and workmanship for one year from the date of original retail purchase.
Puffco does not warranty glass, atomizers, normal wear and tear, or damages caused by accident or abuse. To obtain service, email support@puffco.comor go to Puffco.com/warranty
You will be required to provide proof of purchase details and the device itself when making a claim under this warranty. Do not attempt to open the Puffco Peak base. This will immediately void the warranty for your product.
The Limited Warranty Period begins on the date the product was purchased by the purchaser and lasts for one year. A claim under this warranty is only eligible if it is made within the Limited Warranty Period. Repaired, replaced, and refurbished products are covered for the remainder of their original applicable Limited Warranty Period or 30 days, whichever is longer.
This Limited Warranty shall NOT apply:
If a valid warranty claim is made during the Limited Warranty Period, Puffco will repair or replace at its sole discretion, any defective Product free of charge. Replacement products may be a refurbished or a reconditioned Product of the same model.
All Products and parts that are replaced become the property of Puffco. Puffco can only ship replacement or repaired products to the country where the original Product was purchased.
If you have a question about your product or experience a problem with it, please go to Support. You will find online support tools and information to help you with your product.
To request service under this warranty, contact Puffco at support@puffco.com or puffco.com/warranty, and a Puffco representative will provide instruction on how to proceed.
To make a claim under the Limited Warranty, you must provide the defective Product and a copy of the original receipt of purchase to Puffco for inspection. The receipt of purchase must indicate the Product purchased, price paid, date of purchase, and name of merchant.
To make a claim under the Limited Warranty, you must also obtain an Return Merchandise Authorization (RMA) number from Puffco Support before returning a product. Products returned without an RMA number are not processed and will be returned to you or destroyed. Puffco will provide a pre-paid shipping label for purchasers within the United States. International returns must be paid for by the customer.
Returns must go to the address included on the return label or provided by Puffco Support. If items are returned to any address other than the specific address provided by Puffco Support, Puffco cannot guarantee that the item will be located and processed for warranty support.
Please return only the part specifically requested by Puffco Support, not the entire device.
Postal service carriers require that all items be cleaned prior to mailing. If items are mailed to Puffco uncleaned, Puffco will, in its sole discretion, either dispose of the item or charge a $100 cleaning fee before returning the item.
Once the item arrives at the address specified by Puffco Support, it will be inspected for any possible defects. The Puffco Support Representative that coordinated the return will contact you once they receive the results of the investigation. If the item is deemed defective, it will be replaced/repaired under this warranty.
In preparation of cleaning, carefully remove the glass attachment before unscrewing the atomizer. Also be sure to let the bowl cool down prior to removing the atomizer from the base.
*Before removing atomizer, make sure bowl has cooled down.
*Do not get base wet – its electric – it will break.
*Thoroughly clean device every 20 uses or so.
A good rule of thumb is to thoroughly clean the Peak each time the battery fully depletes and needs to be recharged. The atomizer itself should be soaked in ISO anytime you notice excess flooding or get a rainbow light response from the device.
The best cleaning solution to clean your Peak and Peak atomizer is 99% Isopropyl Alcohol. The reason we suggest 99% Isopropyl Alcohol specifically is because lower percentages of Isopropyl Alcohol have water content that could potentially cause issues.
The rainbow light is an indication that there is a connection issue between the base and atomizer & does not necessarily mean that anything is broken or defective. The first tip is to remove the atomizer, clean the connection pins with a cotton swab dipped in iso and reattach the atomizer. If the atomizer has not been cleaned in some time and there is any sticky material flooding the part it may be best to soak the entire atomizer in ISO, let it fully dry and then reattach the atomizer. When you do so, be sure to screw the atomizer tightly into the base. Sometimes something as simple as a loose connection can be the reason for the issue. If issues persist, contact our support team via Puffco.com/warranty
If you're still getting a rainbow light reaction with the connections clean and clear & a brand new atomizer, you may want to try "back threading" (turn the atomizer counter clock wise for a half turn) to ensure the atomizer threads are properly lining up to the threads of the base. Then tighten the atomizer securely to the base. If issues do persist, contact our support team via Puffco.com/warranty
Not to worry, this simply means that the device has overheated. Simply let the Peak cool down for a little while and normal functionality/charging will resume. If your device is overheating while on the charger you should expect the charge time to take a little over 2.5 hours.
The red flashing light is to indicate that there is a short circuit somewhere in the device. Contact support@puffco.com or Puffco.com/warranty for further assistance.
This can be due the glass not being properly attached or lined up to the base of the device. Even if you’re getting airflow, the inlet hole may be slightly offset which is why no vapor is being transferred from the atomizer through the glass attachment. Simply remove the glass and reattach the piece, carefully aligning the inlet hole with the atomizer first and then popping the rear end of the glass into place. Once in, slightly turn to the right and then back in alignment with the atomizer to ensure the silicone from the base is not blocking the air path from the atomizer.
Are you having issues or having trouble using our products? We are here to support you!
Select a product below to get more information.